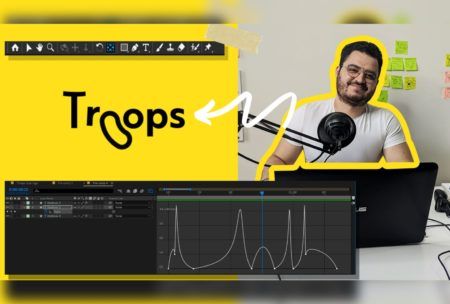
Learn logo animation in After Effects: principles, workspace setup, reveal animations and more. Perfect for designers. Join now! Read more.
Access all courses in our library for only $9/month with All Access Pass
Get Started with All Access PassBuy Only This CourseAbout This Course
Who this course is for:
- Graphic Designers
- Motion Designers
- Illustrators
- Anyone who wants to learn Logo Animation
What you’ll learn:
- Logo Animation Principles
- To Properly Set-up the Workspace
- To Make a Basic reveal and Disappear Animation
- To Make a more Advanced Letter Animation
- To add Colors and Stylize the Logo
- To Animate a wordmark Logo
- To make creative reveal and disappear letter animations
- To Animate Stroke or Line Logos
Requirements:
- Adobe After Effects CC
- Laptop that can run After Effects
- EaseCopy Extension
- Duik Bassel Extension
- And couple more extensions I will mention during the course
- All Extensions can be Downloaded from aescripts
Hello, my name is Adam, professional designer, and animator with over 6 years of experience now.
In this class, you will be learning about the logo animation principles in Adobe After Effects CC. We will be focusing more on the techniques rather than the theory.
Since people react better to videos than images, logo animation can help the designer and the brand connect deeper with their customers.
So, in this course, you will learn about:
- Coming up with the plot and logo restrictions
- The basic principles of logo animation
- Making a simple but neat logo reveal and disappear
- Creating a more advanced logotype animation using the principles of animation
This course is for beginners in logo animation, but being familiar with Adobe After Effects is recommended in order for you to focus on the animation techniques rather than the software.
You will need:
- Adobe After Effects CC, the latest version
- Duik Bassel Free script
- Rift free script
Once you download the scripts, you basically just need to unzip and place the ”.jsx” file in the correct folder.
By the end of this course, you should be able to apply these techniques to any logotypes and symbols.
See you in class.
Project Number 1
Create a similar animation with a reveal and disappearance. You can use the same file. Once you get it, you can try with different logos.
Main steps
- Add layers from AI and convert them
- Animate the scale and the position parameters
- Adjust the speed graph after setting the key frames
- Adjust the mask accordingly
- Export and share your final animation as GIF in the project gallery
Project Number 2
Animate any logotype the same way we animated the ”Troops” logo. Again, it’s better to finish the class project before trying the techniques on a logotype of your choice.
Main Steps
- Open the file
- Start by setting the general positions and rotations
- Always remember to adjust the speed graph after you set the animation
- Animate the general stretching using the path parameters
- Animate using the trim and offset paths
- Add more animation principles using the path parameters. You can also use the CC bend option if you can.
- Add Colors
- Export and share your final animation as GIF in the project gallery
Our Promise to You
By the end of this course, you will have learned logo animation principles in Adobe After Effects CC.
10 Day Money Back Guarantee. If you are unsatisfied for any reason, simply contact us and we’ll give you a full refund. No questions asked.
Get started today!
Course Curriculum
| Section 1 - Introduction | |||
| Introduction | 00:00:00 | ||
| About The Plot And Logo Restriction | 00:00:00 | ||
| Section 2 - Logo Animation Principles | |||
| Basic Logo Animation Principles Explained | 00:00:00 | ||
| Setting Up The Workspace And General Settings | 00:00:00 | ||
| Logo Animation-Reveal And Disappear | 00:00:00 | ||
| Section 3 - Animating The Wordmark | |||
| Animating The Position And Complex Trajectories | 00:00:00 | ||
| Animating Using Trim And Offset Paths | 00:00:00 | ||
| Exploring The Stretching Principle Using The Path Parameter | 00:00:00 | ||
| Adding Animation Principle Follow Trough And Overlap | 00:00:00 | ||
| Basic Frame Morphin | 00:00:00 | ||
| Optional Steps And Adding Colors – Made with Clipchamp | 00:00:00 | ||
| Course Files – Logo Animation | 00:00:00 | ||
About This Course
Who this course is for:
- Graphic Designers
- Motion Designers
- Illustrators
- Anyone who wants to learn Logo Animation
What you’ll learn:
- Logo Animation Principles
- To Properly Set-up the Workspace
- To Make a Basic reveal and Disappear Animation
- To Make a more Advanced Letter Animation
- To add Colors and Stylize the Logo
- To Animate a wordmark Logo
- To make creative reveal and disappear letter animations
- To Animate Stroke or Line Logos
Requirements:
- Adobe After Effects CC
- Laptop that can run After Effects
- EaseCopy Extension
- Duik Bassel Extension
- And couple more extensions I will mention during the course
- All Extensions can be Downloaded from aescripts
Hello, my name is Adam, professional designer, and animator with over 6 years of experience now.
In this class, you will be learning about the logo animation principles in Adobe After Effects CC. We will be focusing more on the techniques rather than the theory.
Since people react better to videos than images, logo animation can help the designer and the brand connect deeper with their customers.
So, in this course, you will learn about:
- Coming up with the plot and logo restrictions
- The basic principles of logo animation
- Making a simple but neat logo reveal and disappear
- Creating a more advanced logotype animation using the principles of animation
This course is for beginners in logo animation, but being familiar with Adobe After Effects is recommended in order for you to focus on the animation techniques rather than the software.
You will need:
- Adobe After Effects CC, the latest version
- Duik Bassel Free script
- Rift free script
Once you download the scripts, you basically just need to unzip and place the ”.jsx” file in the correct folder.
By the end of this course, you should be able to apply these techniques to any logotypes and symbols.
See you in class.
Project Number 1
Create a similar animation with a reveal and disappearance. You can use the same file. Once you get it, you can try with different logos.
Main steps
- Add layers from AI and convert them
- Animate the scale and the position parameters
- Adjust the speed graph after setting the key frames
- Adjust the mask accordingly
- Export and share your final animation as GIF in the project gallery
Project Number 2
Animate any logotype the same way we animated the ”Troops” logo. Again, it’s better to finish the class project before trying the techniques on a logotype of your choice.
Main Steps
- Open the file
- Start by setting the general positions and rotations
- Always remember to adjust the speed graph after you set the animation
- Animate the general stretching using the path parameters
- Animate using the trim and offset paths
- Add more animation principles using the path parameters. You can also use the CC bend option if you can.
- Add Colors
- Export and share your final animation as GIF in the project gallery
Our Promise to You
By the end of this course, you will have learned logo animation principles in Adobe After Effects CC.
10 Day Money Back Guarantee. If you are unsatisfied for any reason, simply contact us and we’ll give you a full refund. No questions asked.
Get started today!
Course Curriculum
| Section 1 - Introduction | |||
| Introduction | 00:00:00 | ||
| About The Plot And Logo Restriction | 00:00:00 | ||
| Section 2 - Logo Animation Principles | |||
| Basic Logo Animation Principles Explained | 00:00:00 | ||
| Setting Up The Workspace And General Settings | 00:00:00 | ||
| Logo Animation-Reveal And Disappear | 00:00:00 | ||
| Section 3 - Animating The Wordmark | |||
| Animating The Position And Complex Trajectories | 00:00:00 | ||
| Animating Using Trim And Offset Paths | 00:00:00 | ||
| Exploring The Stretching Principle Using The Path Parameter | 00:00:00 | ||
| Adding Animation Principle Follow Trough And Overlap | 00:00:00 | ||
| Basic Frame Morphin | 00:00:00 | ||
| Optional Steps And Adding Colors – Made with Clipchamp | 00:00:00 | ||
| Course Files – Logo Animation | 00:00:00 | ||


